library(shiny)

ui <- fluidPage(
  "Hello, world!"
)

server <- function(input, output, session) {}

shinyApp(ui, server)Shiny
November 24, 2025
Agenda 11/24/25
- Shiny examples
- parts of a Shiny file
What is Shiny?
Shiny is an R package that allows you to easily create rich, interactive web apps. Shiny allows you to take your work in R or Python and expose it via a web browser so that anyone can use it.
Examples
See the following gallery of Shiny example from Posit: https://shiny.posit.co/r/gallery/
A simple Shiny App
Put the following into a Shiny App using File \(\rightarrow\) New File \(\rightarrow\) Shiny Web App ... as a file called app.R.
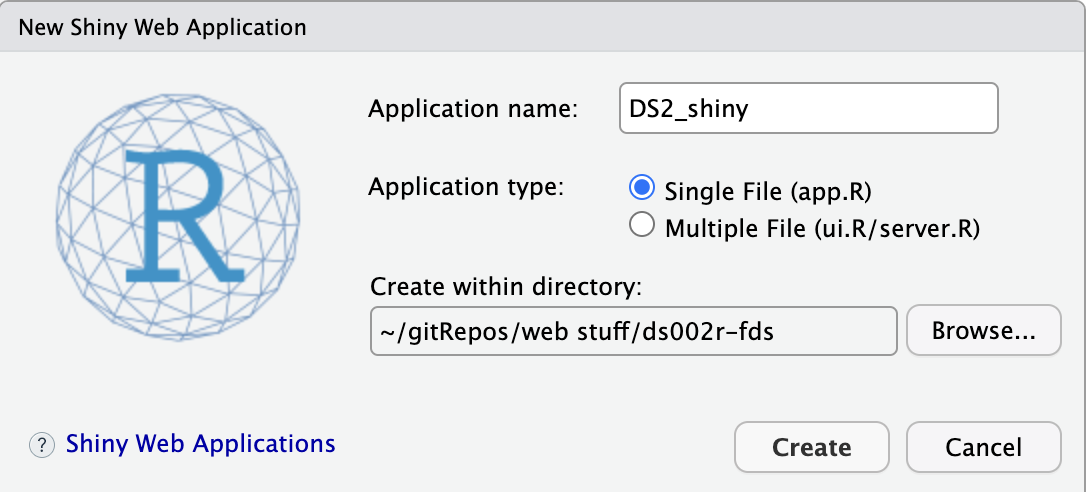
What are the parts of a Shiny App?
Looking closely at the code above, the app.R does four things:
It calls
library(shiny)to load the shiny package.It defines the user interface, the HTML webpage that humans interact with. In this case, it’s a page containing the words “Hello, world!”.
It specifies the behaviour of our app by defining a server function. It’s currently empty, so our app doesn’t do anything, but we’ll be back to revisit this shortly.
It executes
shinyApp(ui, server)to construct and start a Shiny application from UI and server.
How to run a Shiny App?
TipTo run Shiny
- Click the Run App button in the document toolbar.

Use a keyboard shortcut: Cmd/Ctrl + Shift + Enter.
If you’re not using Positron, you can (
source()) the whole document, or callshiny::runApp()with the path to the directory containingapp.R.
What does it look like?
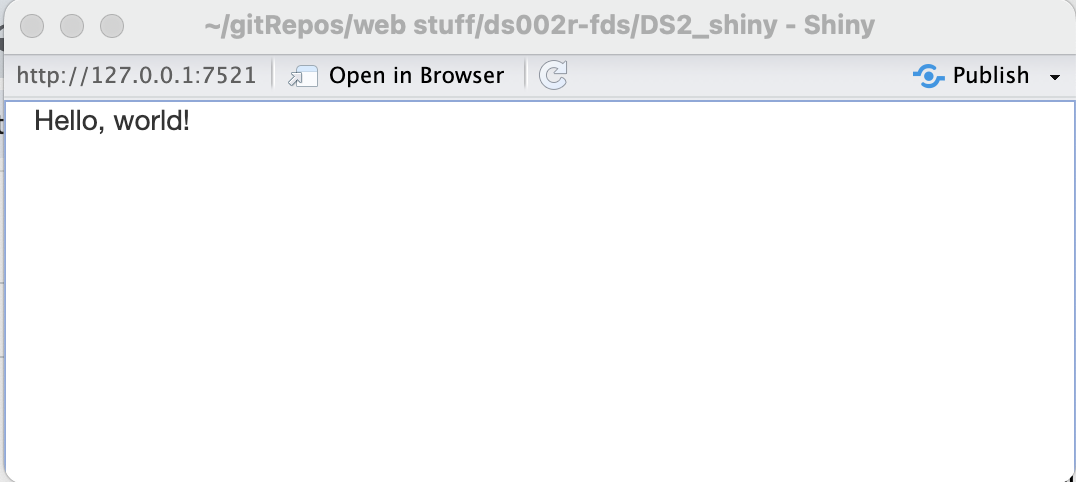
Back in R…
Go back and look at the console. You will see something like:
Listening on http://127.0.0.1:7521R is busy! It is running your Shiny App. You can’t do anything in R because the processes are engaged with the Shiny App.
Deconstructing Shiny
Pieces
Shiny applications will be contained in one app.R file. The file contains two key components:
ui: code for the user interface. The user interface is the webpage that your user will interact with.
server: code for the computer part. What should the computer/server do with your inputs as the user changes them.
The last code at the bottom, shinyApp(ui = ui, server = server), will compile everything together to result in the interactive webpage.
Press Run App at the top of Positron and see what happens!
Pieces
library(shiny)

shinyApp(
  ui = list(
    # new (to you) widgets go here
  ),

  server = function(input, output, session) {
    # somewhat familiar (to you) code goes here
  }
)
A brief widget tour
The default Shinny App
#
# This is a Shiny web application. You can run the application by clicking
# the 'Run App' button above.
#
# Find out more about building applications with Shiny here:
#
#    https://shiny.posit.co/
#

library(shiny)
library(tidyverse)

# Define UI for application that draws a histogram
ui <- fluidPage(
  # Application title
  titlePanel("Old Faithful Geyser Data"),

  # Sidebar with a slider input for number of bins
  sidebarLayout(
    sidebarPanel(
      sliderInput("bins", "Number of bins:", min = 1, max = 50, value = 30)
    ),

    # Show a plot of the generated distribution
    mainPanel(
      plotOutput("distPlot")
    )
  )
)

# Define server logic required to draw a histogram
server <- function(input, output) {
  output$distPlot <- renderPlot({
    faithful |>
      ggplot(aes(x = waiting)) +
      geom_histogram(bins = input$bins, fill = "darkgrey", color = "white") +
      labs(
        x = "Waiting time to next eruption (in mins)",
        title = "Histogram of waiting times",
        y = ""
      ) +
      theme_minimal()
  })
}

# Run the application
shinyApp(ui = ui, server = server)
Running Old Faithful
Run in Positron
See the app in action here: https://shiny.posit.co/r/gallery/start-simple/faithful/
reactive()
The function reactive() is worth pointing out. It is used to create a reactive expression — an expression that is automatically recalculated when any of its inputs change.
Use reactive() when
- You want to perform calculations that depend on user input and automatically update when those inputs change.
- You need to pass dynamically calculated values to other parts of the app (outputs, observers, etc.).
- You need to create reactive data or state, such as subsets or transformations of input data.
Do not use reactive() within any of the render*() functions because they are inherently reactive already!
Live demo
Let’s build a weather app! See sample files here: https://github.com/hardin47/ds002r-fds/tree/main/Shiny_weather
Shiny in Python
Check it out!
Reuse
CC-BY-SA-4.0